Broomstick Crochet is a traditional technique dating back to the Victorian period. It is a very decorative technique which can make the finest mohair’s, to the cheapest polyester and the chunkiest wools, look beautiful – whether by giving them a spider web feel or an architectural structure.
To make this scarf, I used some beautiful wool my husband bought me for Christmas. It is called Jitterbug, made by Colinette, 100% wool, 4 ply and 400yds in length. It’s not cheap, but the colours available are fabulous! He bought it in a lovely wool shop called Woolaballo in the pretty market town of Hexham.
To make this scarf you will need:
1 x 4mm crochet hook (larger if using chunky wool)
1 Ball of wool, sock weight/4ply
1 x 15/20 or 25mm knitting needle (the larger the needle, the bigger to loops)
Wool needle to finish off the ends.
Stage 1:
Cast on in multiples of 5 (for each loop series). I usually cast on 40 chain stitches, plus 2 for turning.
Stage 2:
Crochet 3 rows of double crochet (40 stitches on row)
Stage 3:
Using your crochet hook, slip stitch one loop from the top of each stitch from the previous row and hook it onto the large knitting needle. (Not lady like – but I do find it helps to place the knitting needle between my knees to do this!) If you started with 40 stitches, you should aim to have 40 loops. (The odd one more or less is fine as you can correct it later*).
Stage 4:
Next row. Pick up 5 stitches (loops) together with the crochet hook and double crochet 6 times into them (first set of stitches only). Continue picking 5 stitches together across the row, but now just crochet 5 double crochets into each set. You should now have 40 stitches on your row again.
Stage 5:
At the end of the row, you should now have a pretty ‘fanned’ effect across the top stitches.
Stage 6:
Now, double crochet 2 more rows. Then, as before, make slip stitch loops into the tops of the 40 stitches and place them onto the knitting needle.
Stage 7:
Continue this way until you have reached a length you are happy with for your scarf then cast off last stitch and fasten in all your ends.
Besides making scarves, I have also used this method to make lovely warm neck collars for the tops of coats and small, more fitted snoods which work well as a roll neck on a jumper. Once you know how to achieve the technique, there’s lots of beautiful things you can make.
Below, is a ‘figure of 8’ snood which I made for my niece. This was made using organic, aran weight, Welsh wool. As you can see, this weight makes the Broomstick Crochet less ‘spidery’ but it gives it a lovely architectural look.
*Occasionally, you might find that you end up with 39/41 loops. Don’t worry about this as you can amend this by picking up a batch of 4 or 6 loops to correct the number and ensure you still crochet in a multiple of 5 double crochet stitches to rectify the mistake – no-one will know.
In the orginal photo of the scarf you can see at the top of this blog post. I wrapped the scarf round twice, then placed the two ends of the scarf over each other and pinned it with a brooch. This creates a cowl/snood, very warm effect.
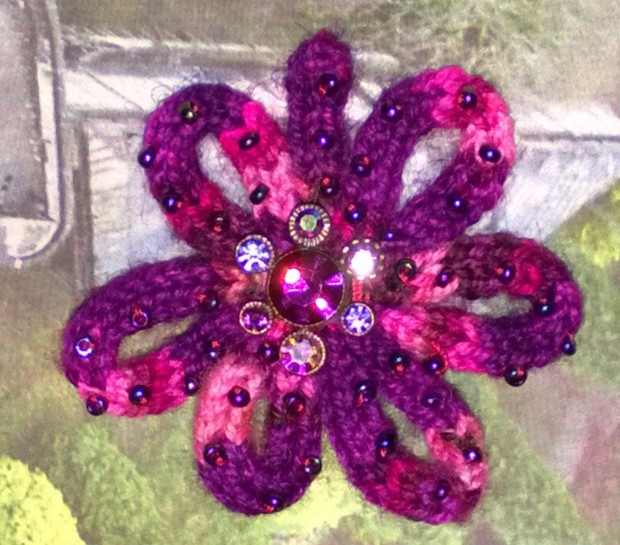
The brooch was made using the last length of the wool. To make it, I French knitted a length, folded it into a flower shape, which I stitched together. Then I decorated it with a piece of broken jewellery in the centre and stitched beads around the edge. This can now be used to keep my scarf together (which doesn’t have to be just an outdoor scarf) or used to decorate a jacket or bag.


Beautiful. I’ve always wanted to try that. I’m bookmarking your tutorial.
LikeLiked by 1 person
Thankyou! I really recommend it and especially if you have a ball of wool that hasn’t got a project planned for it – maybe this is the one! Let me know how it goes. 😊
LikeLike